 |
| Langue De Chat Chocolate Mousse |
French named dessert similar to this usually sells for $7-8/piece, we're gonna make a whole slab (12 slices) for under $14. Glad to be back with you all again. Enjoy! The chocolate lover's dream!
Step 1 of 24 : 500 grams of your favourite baking chocolate. You can use any brand you like. This was on sale so I bought 10 packets. Smart shopper here despite the calories!
Step 2 of 24 : 600 ml of whipping cream to really make sure we don't lose any weight.
Step 3 of 24 : 2 fresh oranges. You can use the supply guide and actually use 4 but the juice is just for dipping the sponge fingers in, so you can choose. In my case it's 2.
Step 4 of 24 : 100 grams of unsalted butter for that real good artery blocking feeling.
Step 5 of 24 : Extract the juice from the oranges.
Step 6 of 24 : We still use prehistoric manual juicers in our house. So for those who don't know how to use one, you push and spin and twist.
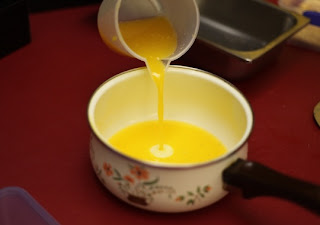
Step 7 of 24 : Pour both fresh juice and packet orange juice into a saucepan add the 3- 4 tablespoons of sugar and heat it up so the sugar dissolves completely. The amount of sugar depends on the sweetness you like.
Step 8 of 24 : Leave the juice to cool right down, while we get the chocolate ready. It's harder to work with hot juice!
Step 9 of 24 : Using a stainless steel bowl over gently boiling water, melt the butter first. Add 1/4 cup of milk just to help the chocolate melt without splitting and burning.
Step 10 of 24 : Piece by piece add the chocolate and stir gently. Please don't burn the chocolate. Even with the double boiler method, you can still burn chocolate. So reduce the boiling temperature to low.
Step 11 of 24 : Melted chocolate! Don't worry about the little gritty lumpy bits. That's what happens when you turn on the fire too high and you don't add enough milk at the beginning of the melting process.
Step 12 of 24 : Onto the cream. Lightly whip the 600 ml of cream with the beater. We don't want it firm.. Firm cream reduces the bubbles ... Bubbles??? So about 2 minutes or until soft peaks form.
Step 13 of 24 : Beat beat beat! For me chocolate mousse should have LOTS of bubbles. With this recipe, if you take away the sponge fingers you end up with the best mousse ever!!
Step 14 of 24 : In a square tin, place enough plastic wrap to cover the entire inside of the container. It needs to hang over the edges also so you can pull the cake out when it's firm.
Step 15 of 24 : Pour the whipped cream into the chocolate. You're gonna love this part!! This is where you get to lick the chocolate. Just to taste ;)
Step 16 of 24 : Mix / stir by folding first. Then you can go all out with the spoon.
Step 17 of 24 : Make sure you get all the chocolate from the bottom of the bowl too. Keep stirring until it's all the same colour.
Step 18 of 24 : Dip the sponge biscuits into the cooled down orange juice..don't drown the biscuit or it will break. A little soak will do.
Step 19 of 24 : Start laying them to rest side by side in your square tin.
Step 20 of 24 : Cover with chocolate
Step 21 of 24 : Add more layers of biscuit .. Don't you remember how much we love layers?
Step 22 of 24 : More biscuit...
Step 23 of 24 : More chocolate ... More biscuit .... And your top layer must be biscuit. They will be the platform for when you turn it over. Put it in the fridge overnight and .... Enjoy!!!
Step 24 of 24 : Enjoy your cake!


No comments:
Post a Comment